Turn your story into a
manga chapter.
Character consistency across every panel. Four manga traditions, nineteen styles in all. Dialogue in baked-in speech bubbles. No drawing skill needed.
By the TaleAtelier Editorial Team ·
Free preview — no sign-up, no card. An account saves your characters and story drafts. Paid generation starts at $9.99/mo. Cancel anytime.
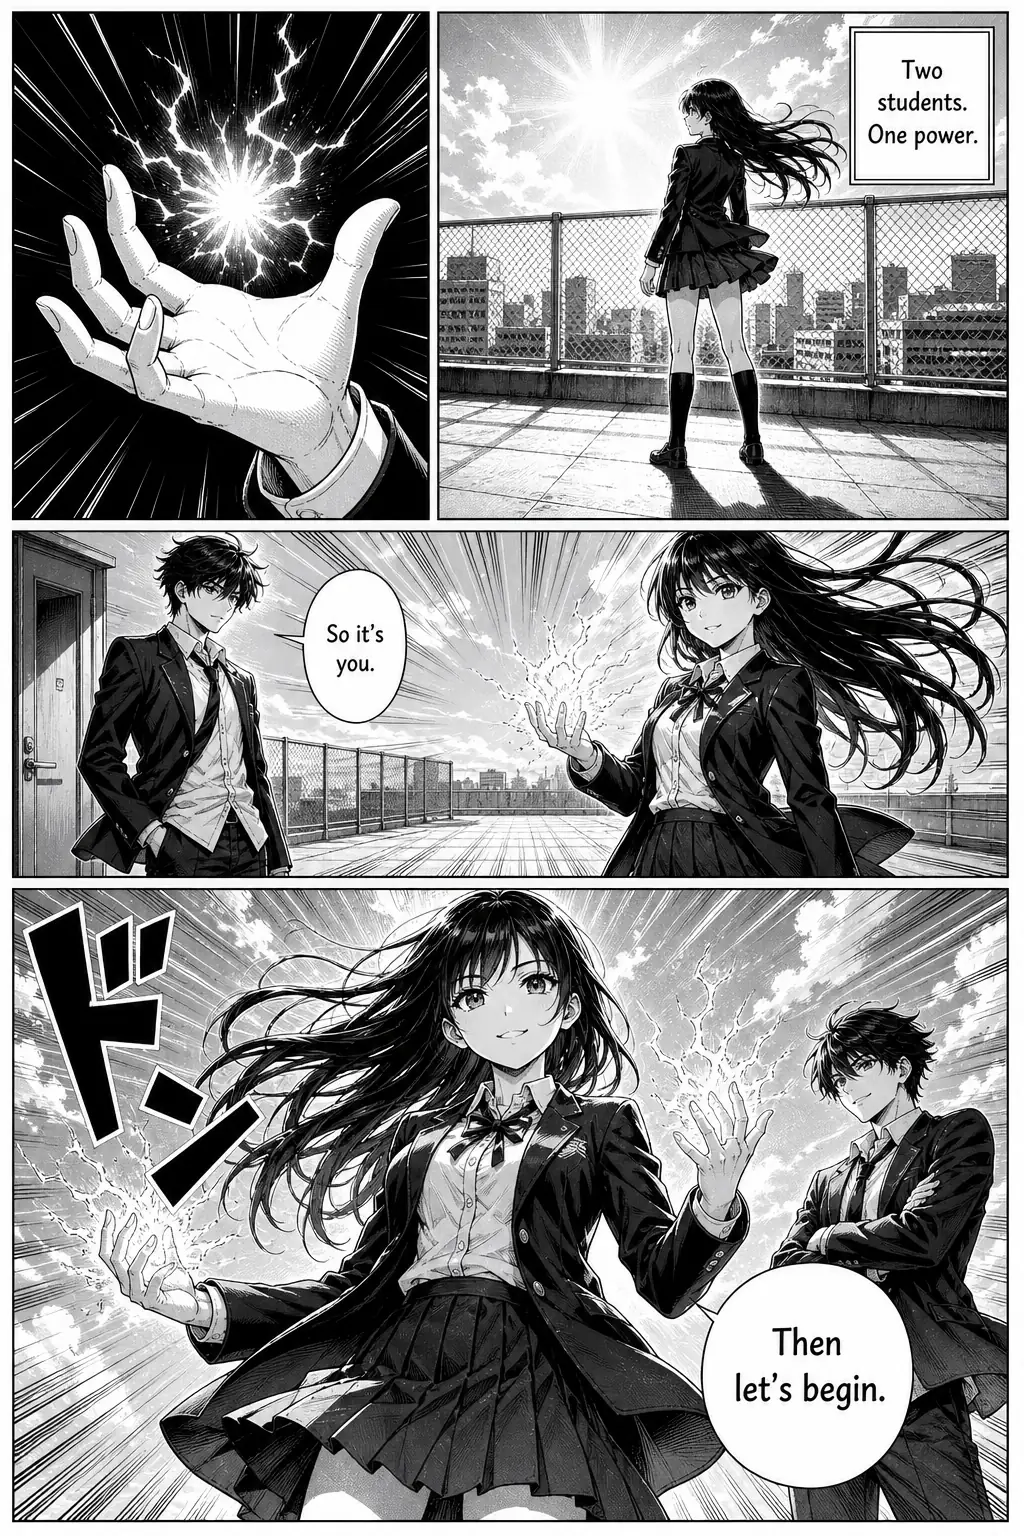
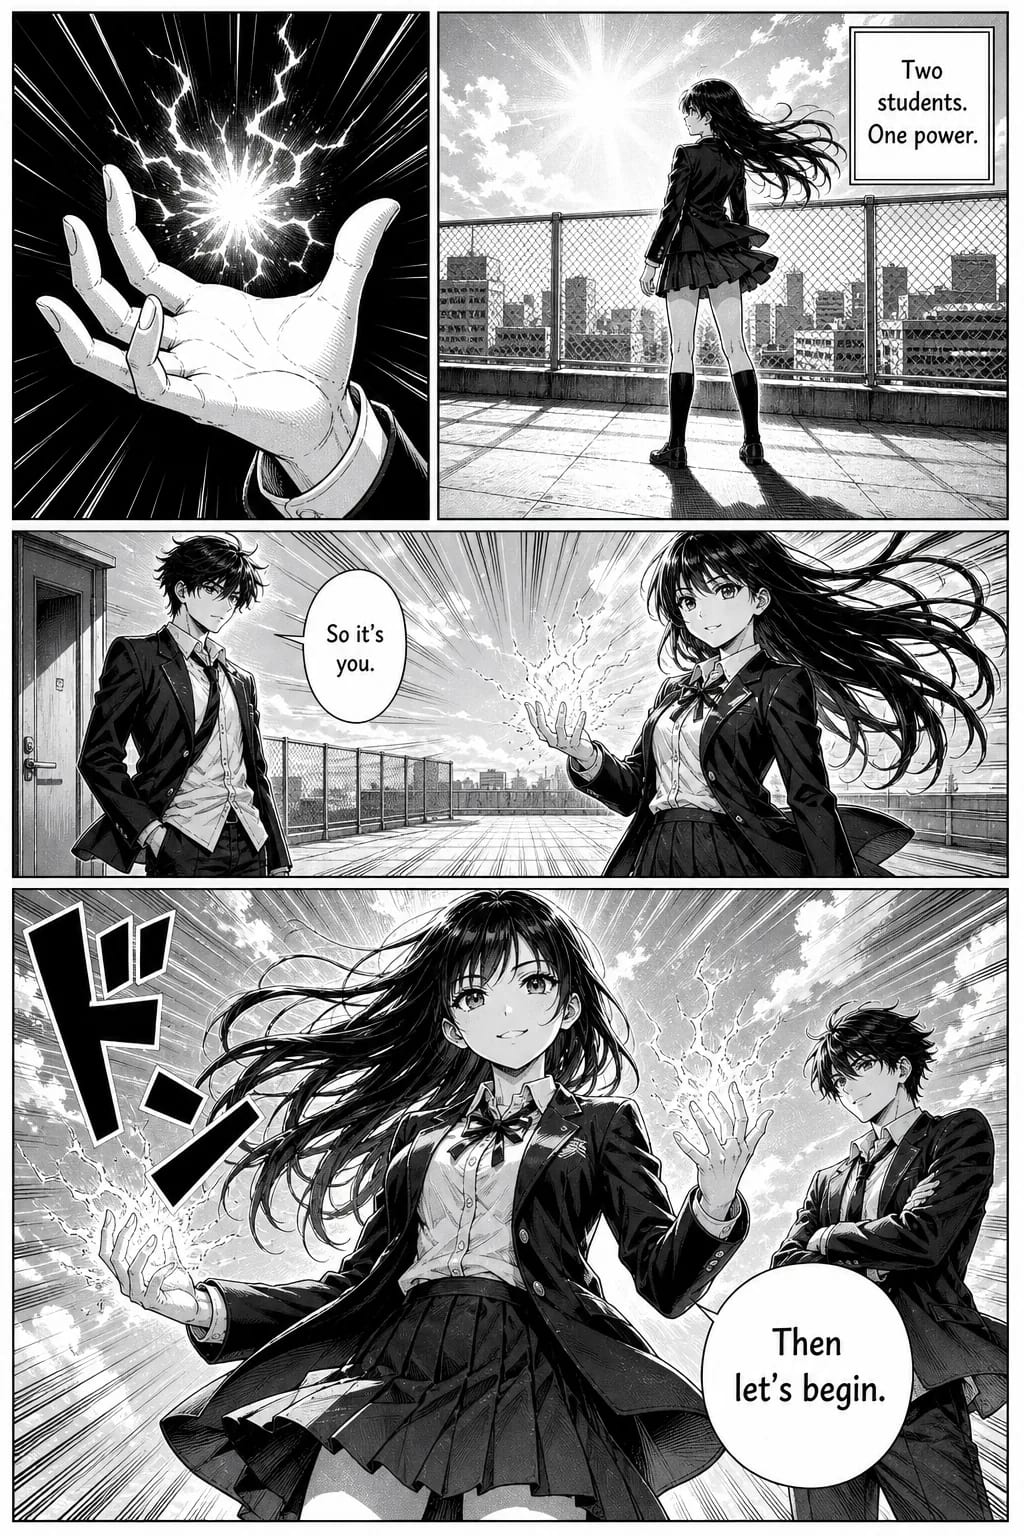
Try it — no account
Five steps — style, length, language, cast, story — and you get your cover and first page free, generated from your own story. No sign-up, no card. Continuing the comic needs an account. Generation takes about 2-3 minutes.
TaleAtelier's AI manga generator turns a text prompt into a full manga chapter — multiple pages of story, not a single page. It keeps the same characters consistent across every panel and page, offers the four manga traditions in the free preview and nineteen styles in the full editor, and lets you include dialogue that's baked into speech bubbles. No drawing skill required. Plans from $9.99/mo.
For the full technical explanation of how character consistency works — locked reference, honest comparison to Midjourney sref, Stable Diffusion LoRA, Leonardo, and every major model — see our consistent character AI pillar. Prefer to paste a story or script instead of prompt-driven generation? See text-to-comic for the three-tier input workflow. Not sure if you want manga, manhwa, or manhua? See the three-way comparison guide.
How to make a manga chapter with AI
Four steps from a story idea to a finished manga chapter. First-time users typically finish a single page in 15-30 minutes; experienced users work faster once their character reference is set.
- 01
Describe your cast and setting
Manga lives and dies on cast. Before you generate a single panel, write short profiles for each character — hair, eye color, distinctive clothing, one personality trait, one visual quirk. Then set the world: modern Tokyo high school, feudal Japan, isekai fantasy kingdom, near-future space station. TaleAtelier uses these descriptions to lock character identity so the same face appears in every panel — the single hardest problem in AI manga generation and the reason most other tools produce inconsistent output.
- 02
Write the scene beats
A manga page is a sequence of moments, not a single image. Break your scene into 3-5 beats: character enters, notices something, reacts, decides, acts. Each beat becomes a panel. Keep beats visual — 'she reads a text and her expression shifts' is a panel; 'she thinks about her past' is not. TaleAtelier's story input takes plain English scene descriptions. Include dialogue in quotes and it'll be routed into the baked-in speech bubbles.
- 03
Pick a manga art style
Four, and they are the four manga traditions: classic manga (black-and-white ink and screentone), seinen (denser line, cross-hatched shadow, older readership), manhwa (Korean, soft full colour) and manhua (Chinese, painterly colour). Those are the four offered in the free preview above. The full editor carries nineteen styles in total — the same four plus anime, chibi, superhero, comic-book, cartoon, noir, sci-fi, fantasy, horror, comedy, watercolour, oil painting, pencil sketch, line art and pixel art — which is where you go if you want a manga-style story rendered in something other than a manga tradition. Shonen and shojo are not styles here: they are tones your story sets, and either reads correctly in any of the four. Style is chosen once per generation, and holding one across a chapter matters more than picking the best one.
- 04
Generate, review, refine
Hit generate. You'll have a multi-page manga chapter with your cast in your setting in your style, with dialogue in speech bubbles. Review each panel: is the character recognizable? Does the composition read left-to-right (or right-to-left if you set that)? Is the dialogue placement working? Regenerate specific panels if a face drifts or a beat lands wrong. Export as PNG or PDF when the chapter reads the way you meant it to.
The same cast, page 1 to page 12
This is the thing that separates a manga chapter from a folder of nice pictures. Your character reference is locked once, before generation, and every later panel is drawn against it — rather than each panel being a fresh roll of the dice from the same description.
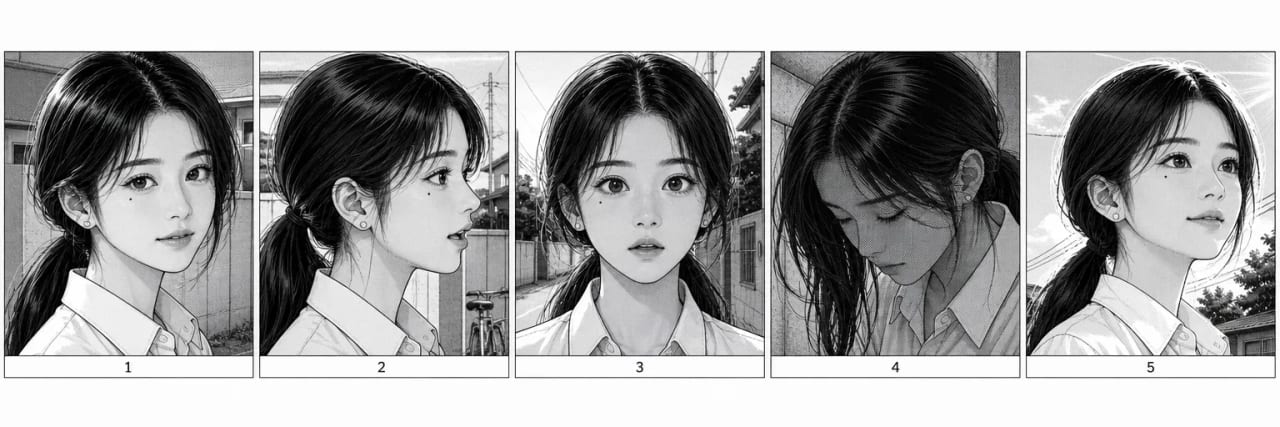
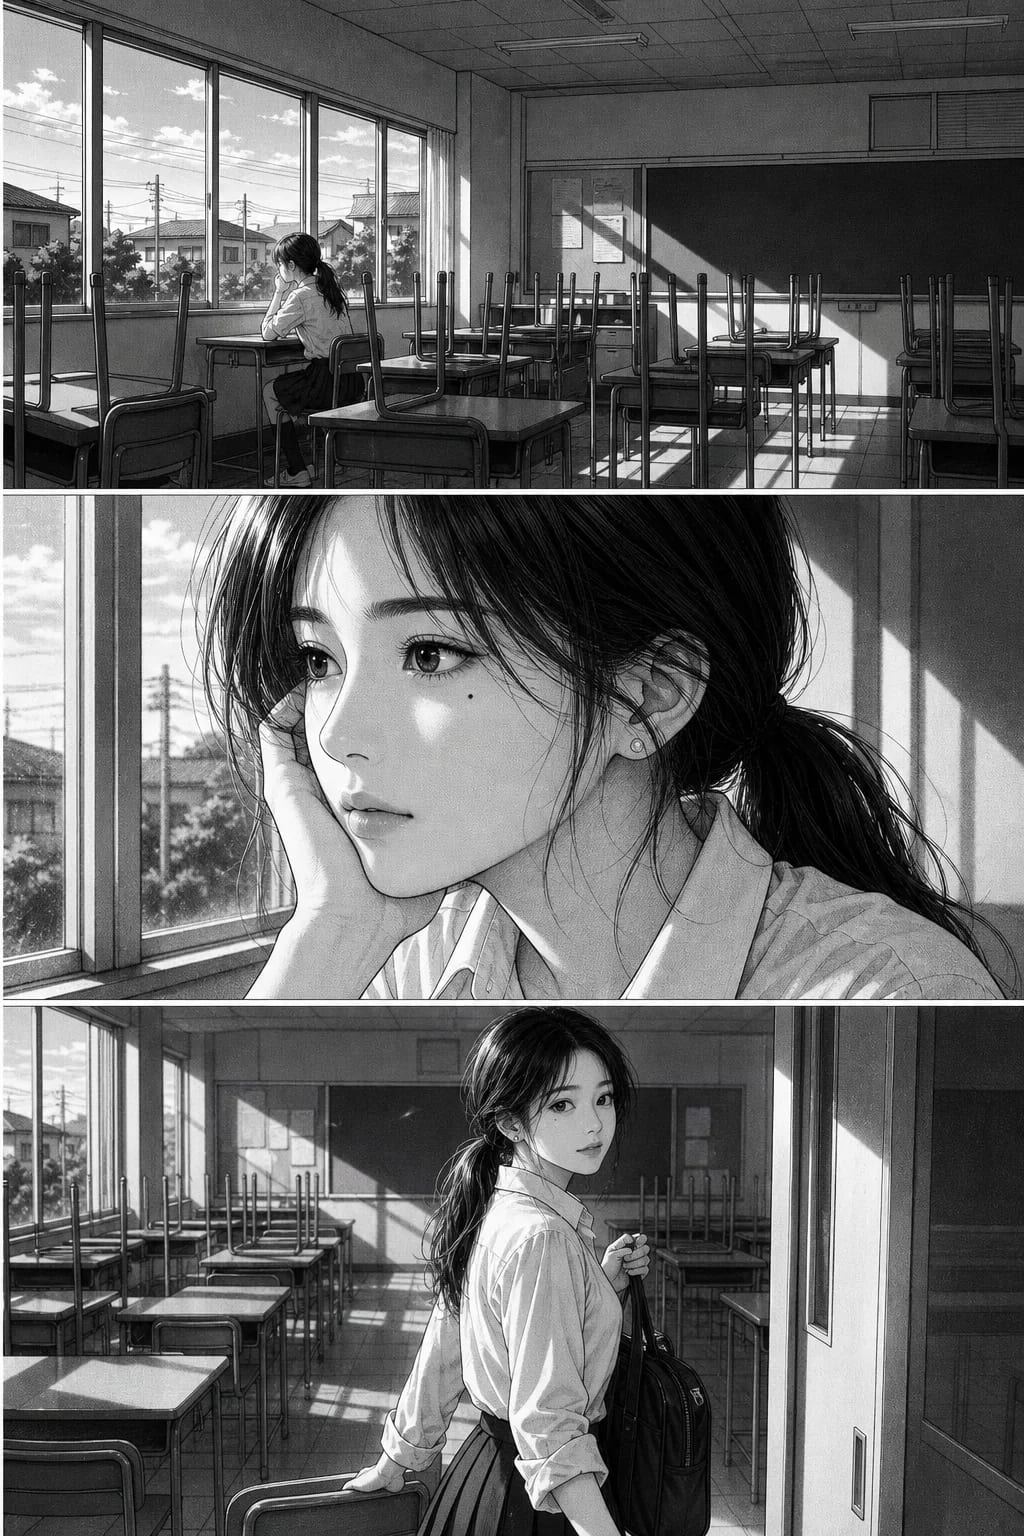
Face, hair, and the main outfit silhouette hold across a whole chapter. That is what the lock is for, and it is why a reader believes panel forty shows the person from panel one.
What still drifts. Hands in complex poses, background characters, and fine costume detail at extreme angles. That is a limitation of current image models rather than of this tool specifically, and every generator in the category has it. Giving a character one hard anchor detail — a scar, an eyepatch, a distinctive collar — and writing it into the script once measurably improves what survives.
The bubbles are placed for you
This is the step most people are doing by hand. The common workflow in the category ends with panels exported one by one and dialogue typed over them in PowerPoint, because most generators stop at the art.
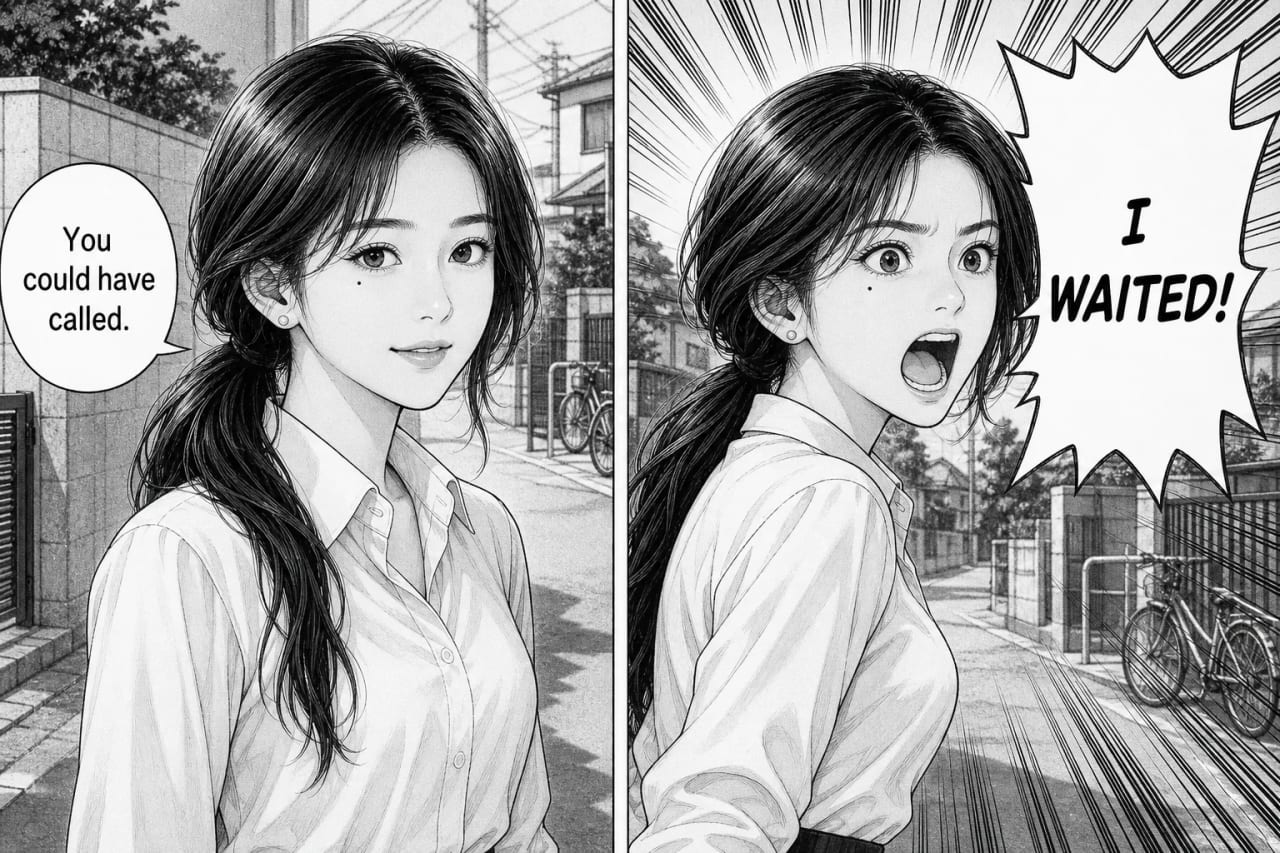
Put dialogue in quotes in your script and it is typeset into the panel at generation, as part of the art. Bubble shape follows the beat you wrote — round for ordinary speech, spiky for a shout, cloud-shaped for thought. Panel composition and gutters are laid out with it.
Where it stops. The bubbles are baked into the page, not a text layer you can drag or reshape afterwards. If you need that control — nudging a tail, resizing a balloon to fit a redraw — a comic authoring app is the right tool, and the honest move is to say so rather than pretend otherwise.
Real manga is black and white
Not desaturated colour — actually monochrome, with value built from screentone. It is a print inheritance: weekly serialisation was cheap in black ink, and mangaka turned the constraint into a visual language that colour would flatten.
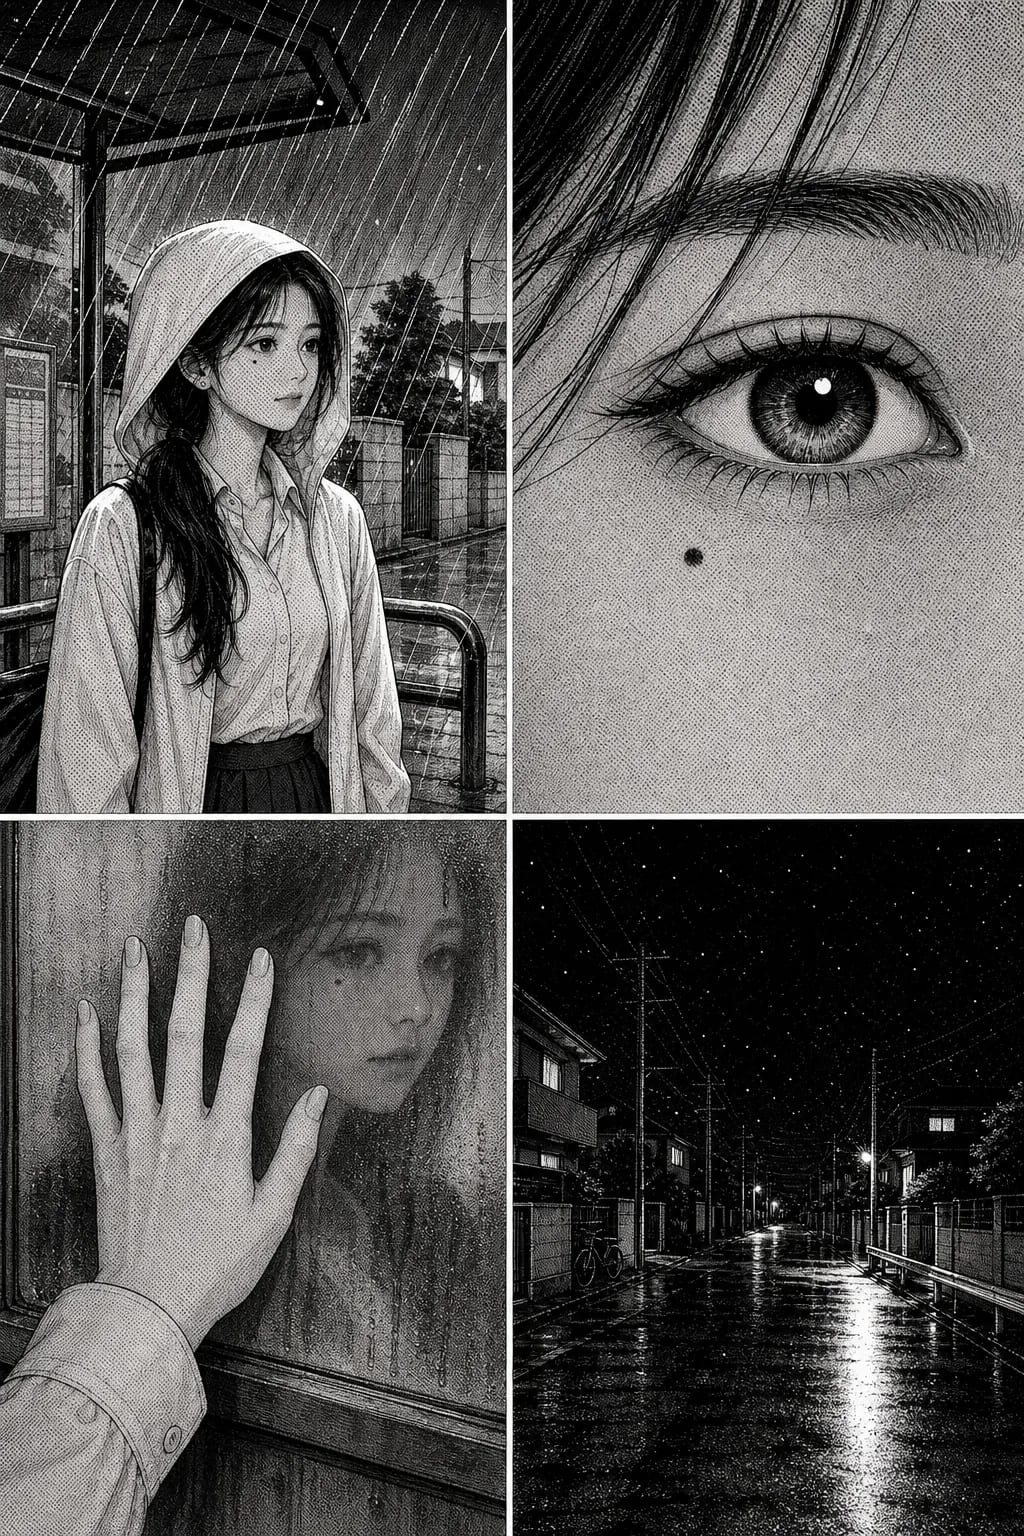
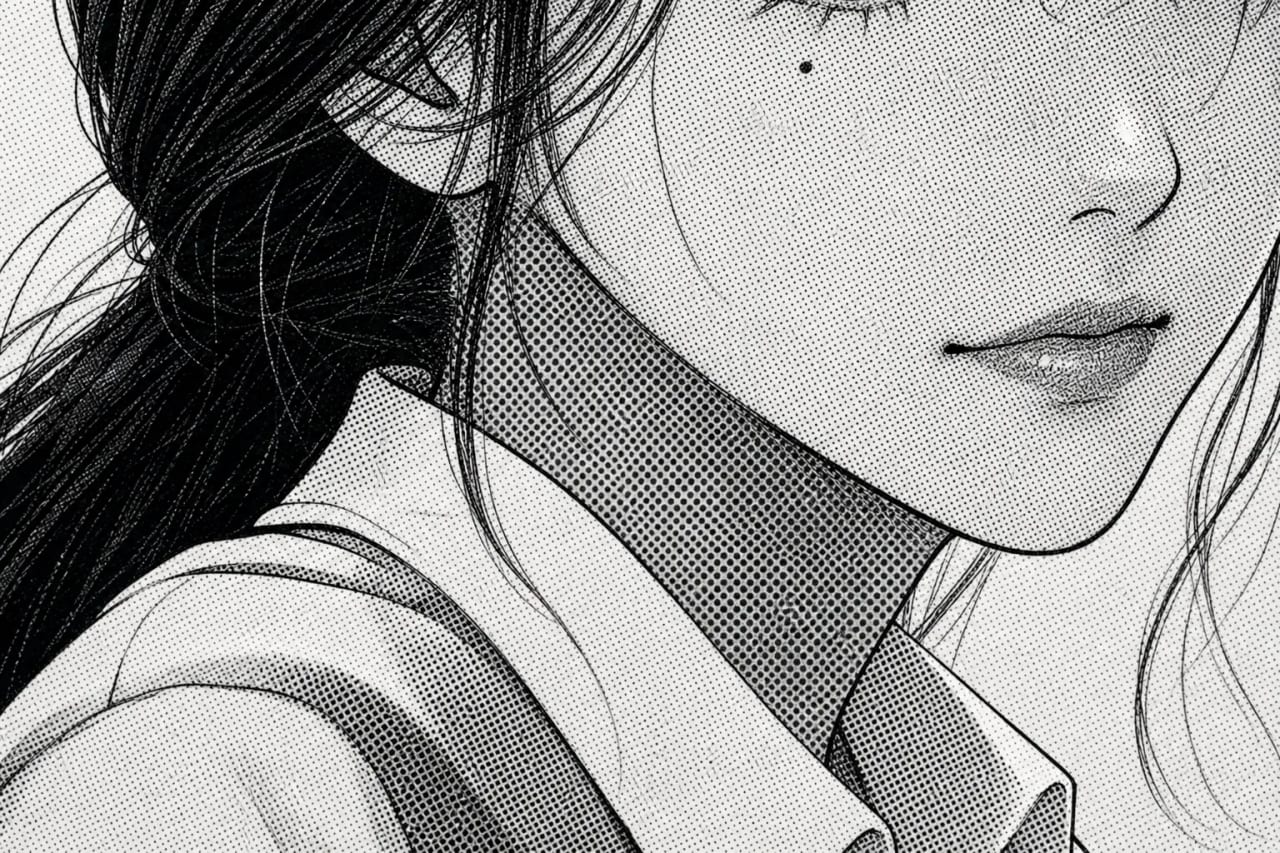
Screentone does the work colour would do elsewhere — dot patterns and gradients for shadow and mood, ink density for weight, line-weight variation for depth. To a reader raised on manga, tone reads as atmosphere; a generic AI render with smooth digital shading reads as not-manga immediately, even when the drawing itself is competent.
Which style is monochrome. Classic manga is the one that generates genuinely black-and-white pages. The other three traditions are colour and always were: seinen is a readership rather than an ink convention, tuned here for the grounded full-colour realism of Berserk or Monster; manhwa and manhua are Korean and Chinese comics, born digital and vertical rather than in cheap weekly print. If you want colour vertical-scroll specifically, the webtoon maker is built for it.
You write this. You get this.
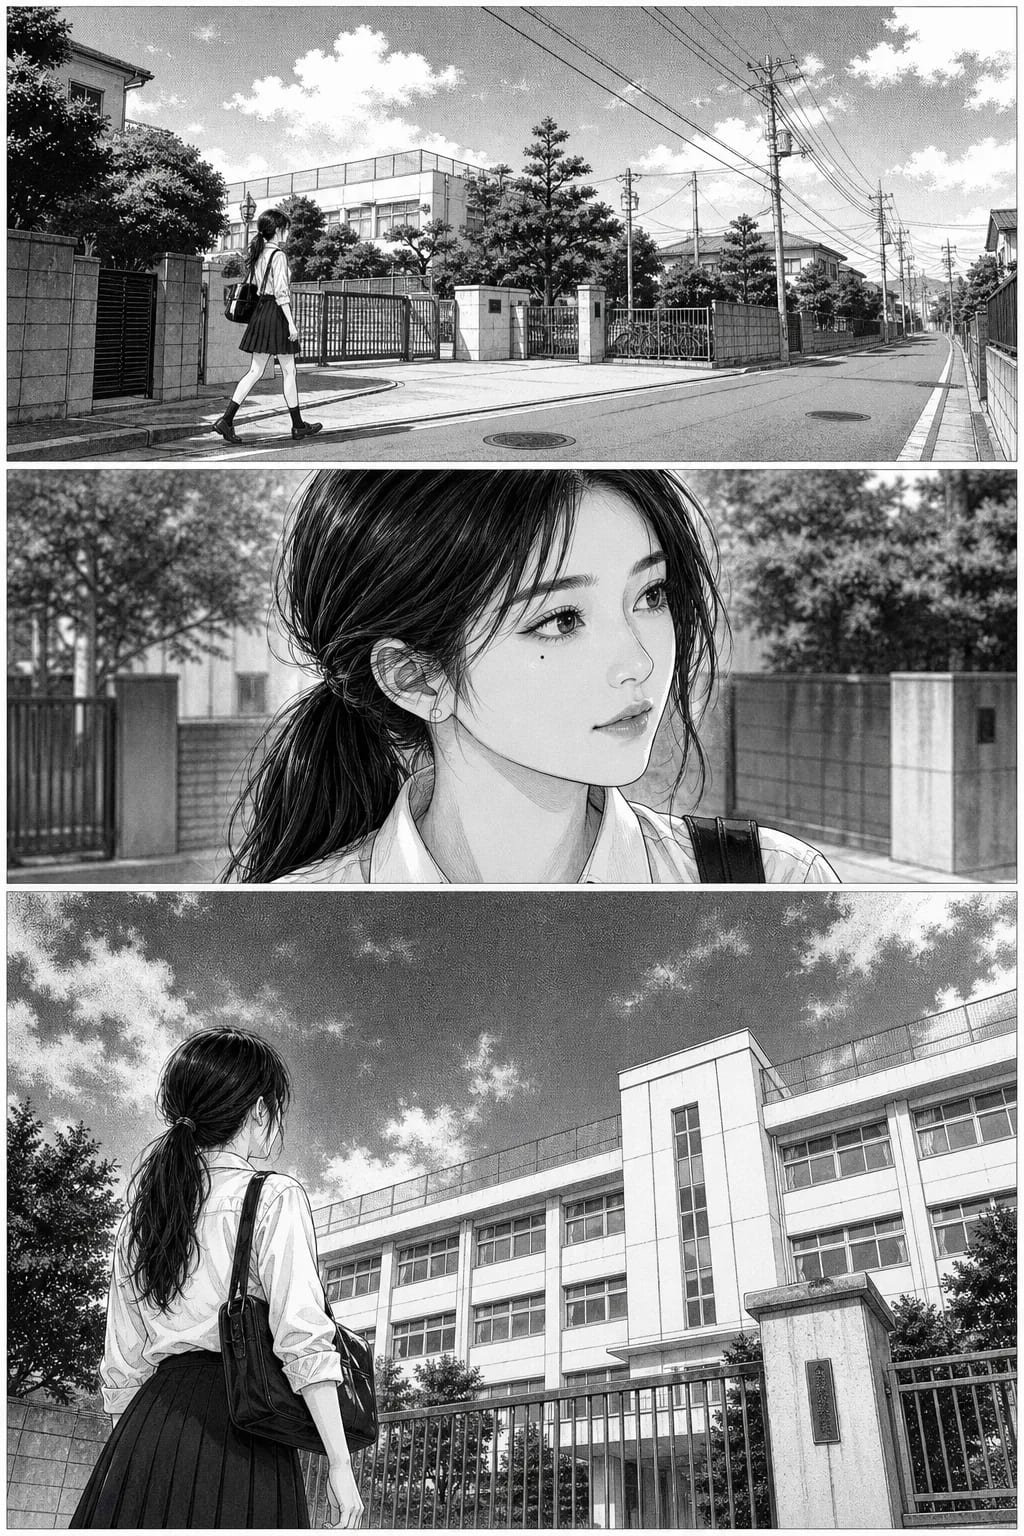
No panel numbers, no camera language, no script formatting to learn. This is the whole input — a hundred and ten words — and the five pages below are what came back from it.
Mira: black hair in a low ponytail, red hoodie, sharp eyes.
Kei: taller, cropped dark hair, grey jacket, always looks half-asleep.

Mira waits at the school gate, checking her phone / the crowd thins out / she's the last one there.

Kei walks up behind her. Mira doesn't turn around.
Mira says "You're forty minutes late."
Kei says "I know."

Wide shot of the two of them from across the street, the gate closing behind them.
Mira thinks: "He came anyway."

Close-up on Mira's hand letting go of her phone.
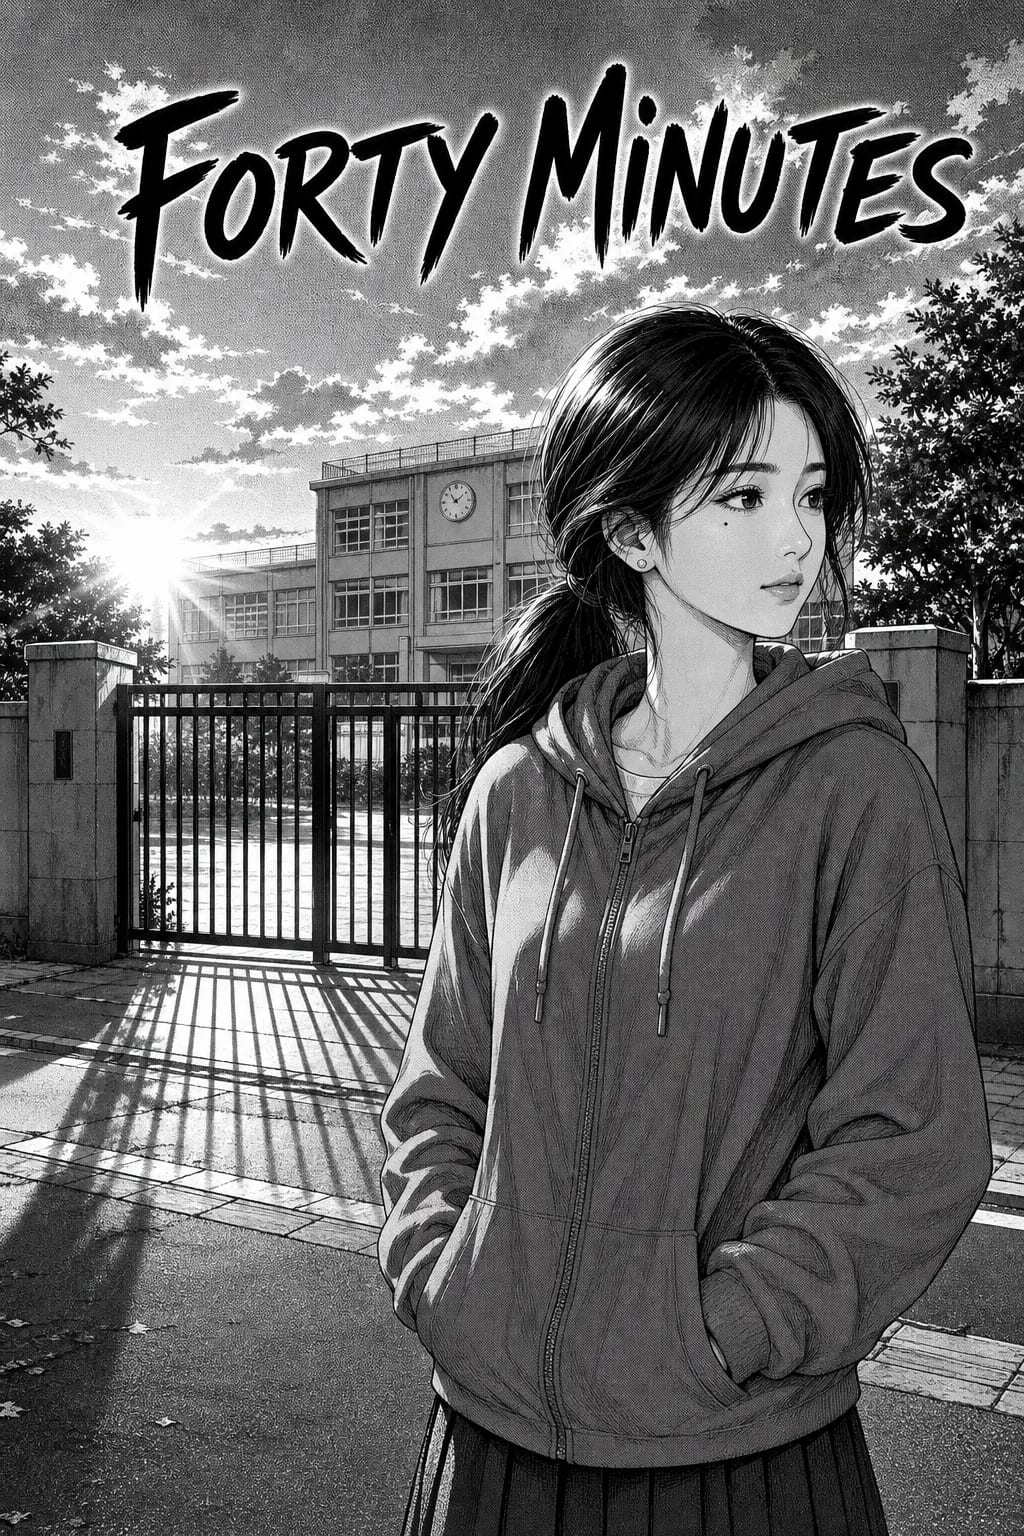
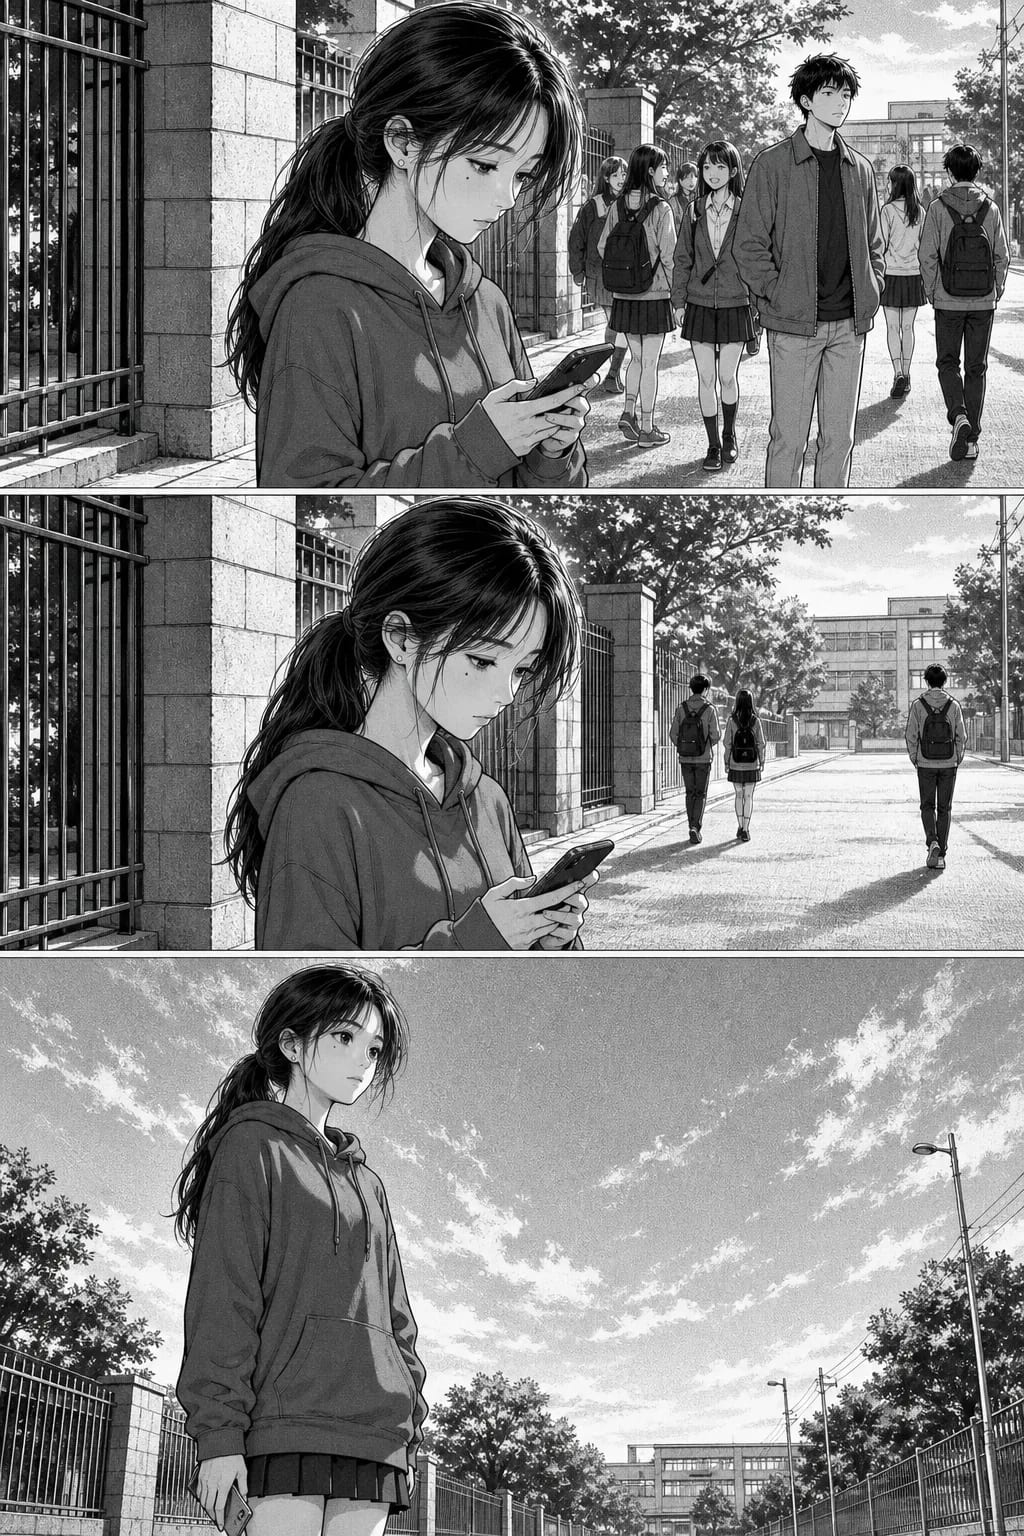
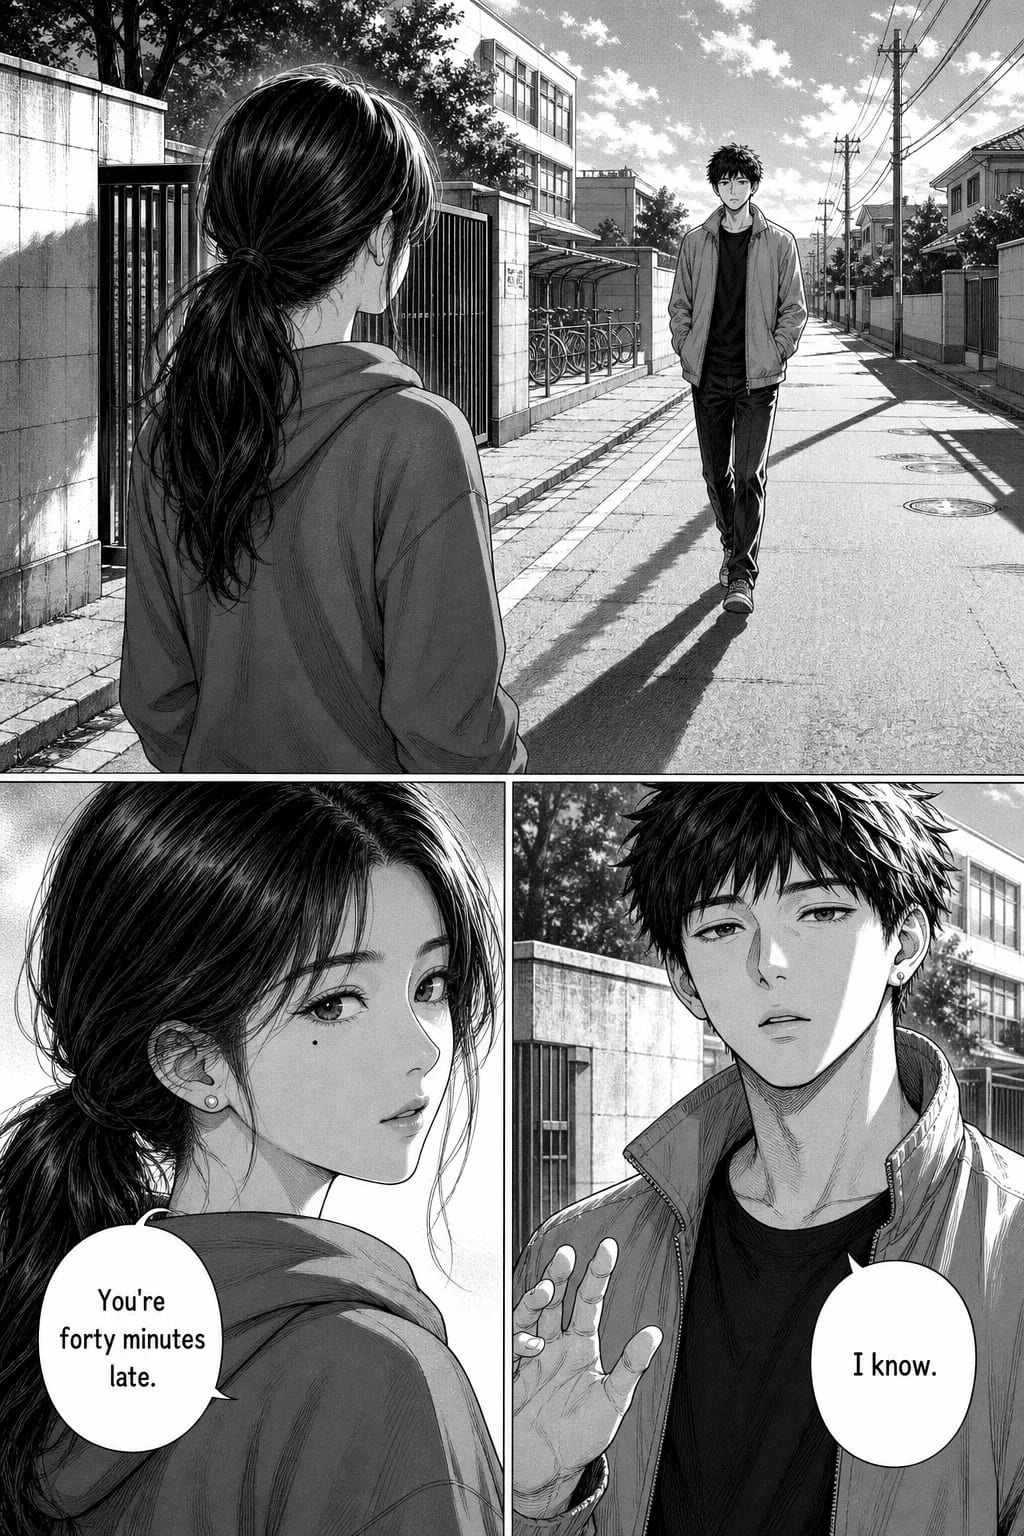
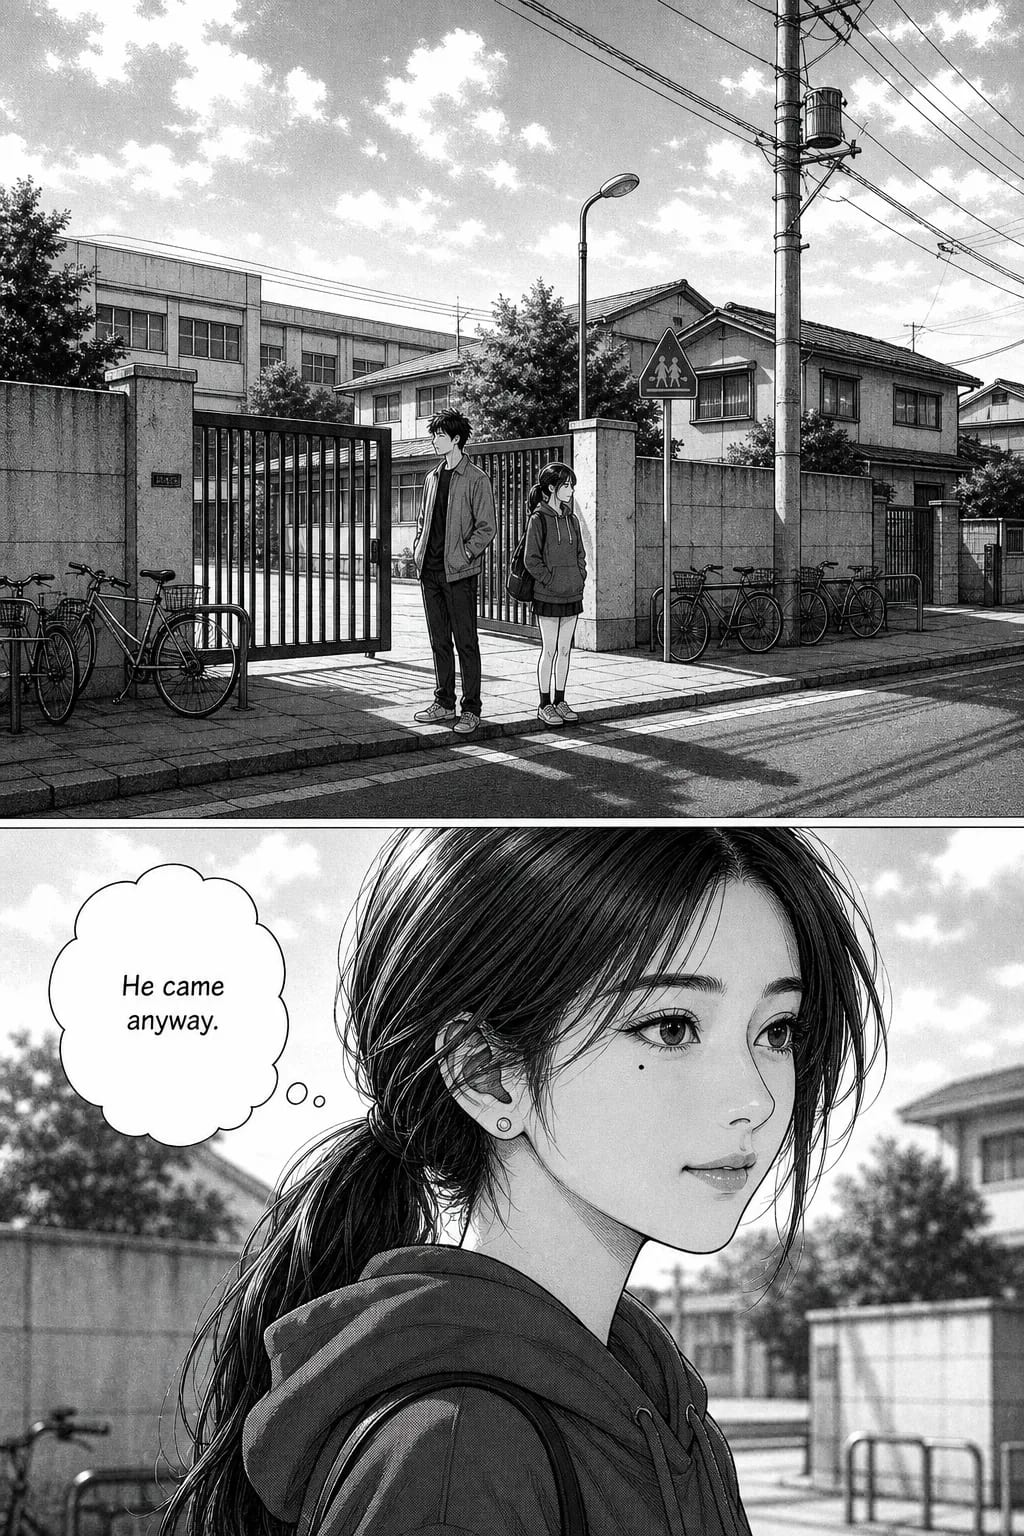
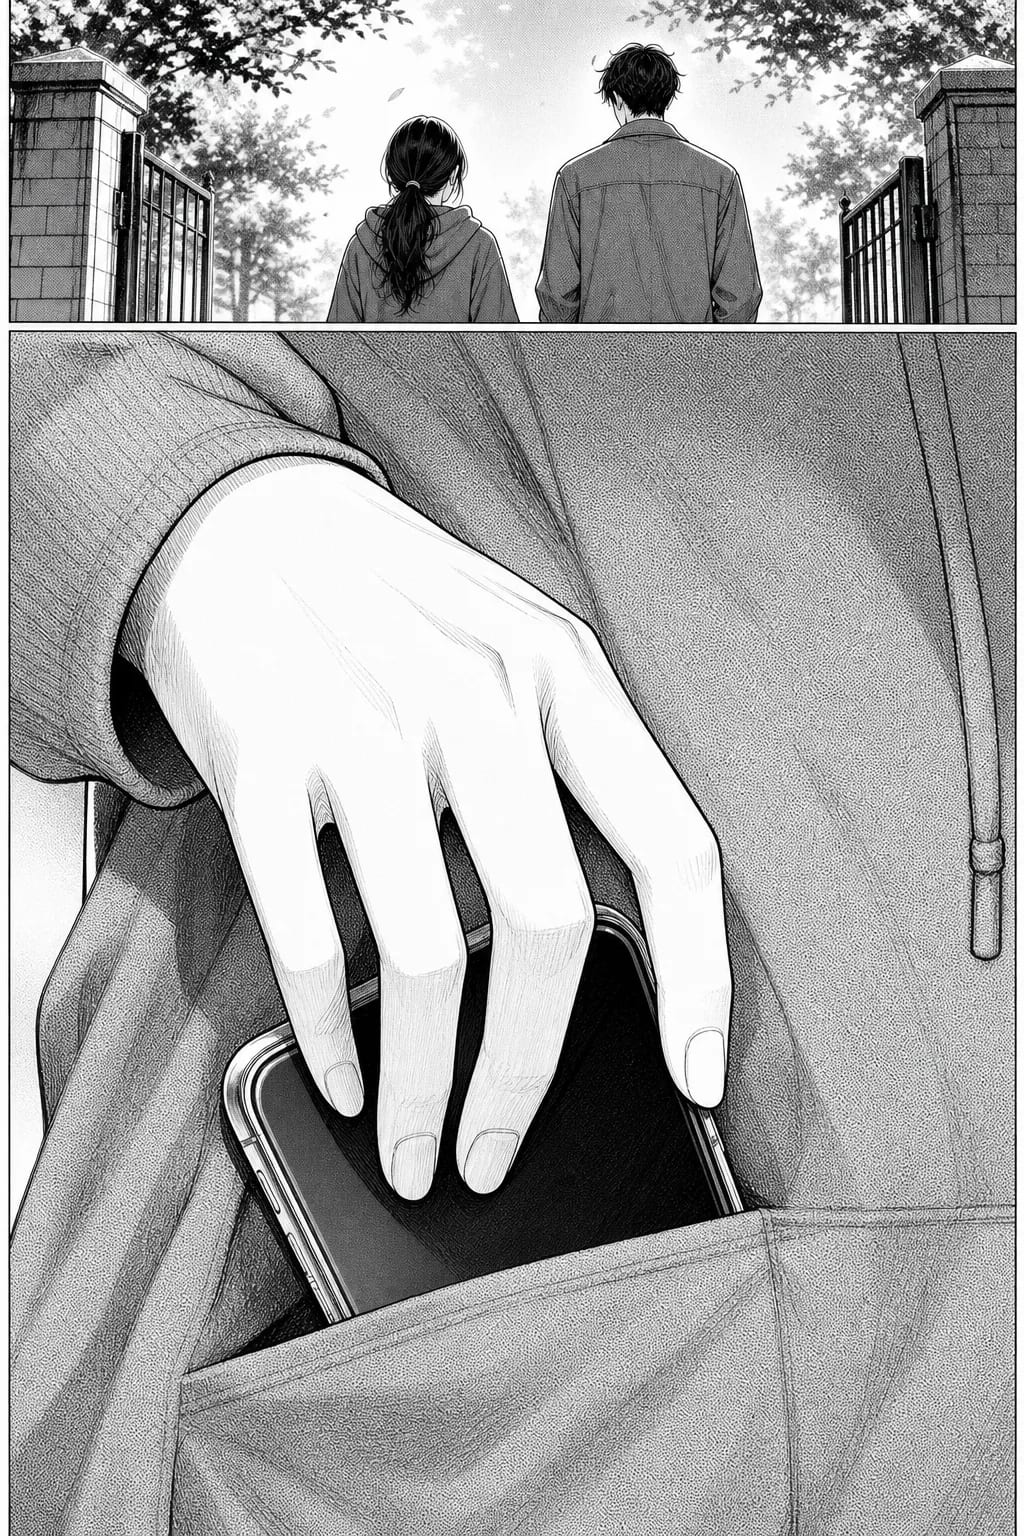
Worth checking against the script: the three slash-separated beats on the first line became the three panels of page one. Both quoted lines are lettered word for word. The thought line became a cloud-shaped bubble rather than a speech one. And the two places the script names a shot — the wide view from across the street, the close-up on her hand — are the two pages built around exactly those framings. The rules that produce this are below.
How to write a manga script for AI generation
You don't need to know traditional manga script format. What you do need is a way of writing that turns cleanly into visual panels. This is the practical guide — and the sample script above follows every rule in it.
Write in scene beats, not paragraphs
A traditional manga script has panel numbers, camera directions, dialogue, and SFX cues. TaleAtelier doesn't require that format. What it needs is a scene broken into visual beats — discrete moments the eye can rest on. A page like "Mira walks to school and thinks about the exam" produces one confused panel. The same page written as "Mira leaves her house / walks past the cherry blossoms / stops at the crosswalk / checks her phone / expression tightens" produces five clear panels the generator can compose.
Include dialogue in quotes, action outside quotes
Anything you write in quotes gets routed to a speech bubble. Anything outside quotes describes what the panel shows. So 'Mira raises her hand and says "So it's you"' gives you a panel where Mira has her hand raised and a speech bubble reading "So it's you." Simple rule. It works for internal thought too — write it in quotes and label it: 'Mira thinks: "Not again."' The generator uses a thought-bubble shape.
Describe framing when it matters
By default the generator picks framing based on the emotional beat — close-ups for reactions, wide shots for reveals. If a specific framing matters to your story, name it: "extreme close-up on her eye," "wide establishing shot of the school from across the street," "low-angle hero shot as she raises both hands." You don't have to direct every panel; only the ones where a specific shot carries the story.
Keep character names consistent across pages
Once a character is defined (Mira: black hair in a low ponytail, red hoodie, sharp eyes), use the same name every time she appears. Don't switch to "the girl" or "our protagonist" mid-chapter — the character reference stays anchored to the name. Ensemble casts of 3-4 named characters work well. More than five names on a page and readers lose track anyway, regardless of the tool.
Plot, story, and script — what each of these means
Plot is the sequence of events. Story is what those events mean. Script is the written document that describes both well enough for someone else to draw. TaleAtelier's story input handles all three at the scene level: describe the events, the meaning shows through character reaction, and you don't need a formal script document. If you're writing for a full chapter, sketching a beat-by-beat plot outline first (even in bullet points) will make your page-by-page generation faster and more coherent.
What makes manga different from generic AI art
Manga isn't just anime-style portraits. Real manga follows visual conventions built up over 70 years — conventions that generic AI image generators ignore and that readers immediately notice.
Panel flow and reading direction
Traditional Japanese manga reads right-to-left, top-to-bottom. English-translated releases usually mirror this to read left-to-right. Whichever direction you pick, panels have to flow — the eye should move naturally from one beat to the next without backtracking. A well-composed manga page reads in one pass; a poorly-composed one forces the reader to hunt for the next panel. TaleAtelier composes pages in your chosen reading direction from the start.
Screen tones, ink density, and line weight
Screen tones carry value and texture where colour would elsewhere; line weight varies, thick on outer contours and action lines, thin on interior detail. Generic AI art misses both, which is the tell. Shown up close in Real manga is black and white.
Mangaka framing — close-ups, wide shots, action beats
Manga framing is more cinematic than Western comics: extreme close-ups on eyes for emotional beats, wide establishing shots for scene transitions, dynamic diagonal panels for action. Standard "one character centered per panel" composition telegraphs generic AI output. Real manga pages vary the framing deliberately — a close-up next to a wide shot creates emotional contrast that reads on the page.
Speech bubbles and vertical text
Japanese manga sets vertical text in vertical bubbles; English adaptations use horizontal bubbles with Roman text, which is the convention our baked-in lettering follows. Bubble shape carries meaning either way — round for speech, spiky for a shout, cloud for thought. How that lands on a page is in The bubbles are placed for you.
Panel, page, and chapter — what to generate
Different AI manga tools generate at different scopes. The distinction matters because it changes what you can do with the output.
Panel generation — one moment at a time
Some tools generate one manga panel per request. You describe a single moment, get one image, then move to the next. Advantage: fine control over each panel individually. Cost: slow, and character consistency across panels becomes your problem to manage — you have to re-anchor the character in every request. Use this mode when you need a hero panel for a cover, a promotional image, or a single dramatic beat.
Page generation — the default for real manga work
A manga page is a composed unit — multiple panels arranged in an irregular grid, reading in order, telling a scene. TaleAtelier defaults to page generation: describe a scene of 3-5 beats and get a full page back with panels composed and dialogue placed. This is what makes it a manga generator rather than a manga-style image generator. Character consistency is handled across the whole page in one shot.
Chapter generation — multi-page stories
A chapter is 15-40 pages of the same story with the same cast. TaleAtelier handles chapter-length work by anchoring your character references once and reusing them across every page. Practically: you generate page by page, but the character lookup stays constant, so page 27 looks like page 3. This is the mode you want if you're publishing a serialized manga.
Which mode to pick
First-time users: start with page generation for one test page. See how the output looks with your cast and style before committing time to a chapter. Panel-only mode is niche — most creators want page or chapter output. If your real goal is a single manga-style hero image (character portrait, cover art), a general image generator may be a better fit than a manga-page tool.
What you can control
The five things that actually matter for making a manga chapter you'd publish, not just a manga-style portrait.
| Feature | What it does |
|---|---|
| Character consistency | The same face, hair, and outfit hold across every panel on a page and across every page in a chapter. Solved via a locked character reference, not per-panel prompting. |
| Four manga traditions, nineteen styles in all | Shonen, shojo, seinen, classic manga, chibi, plus adjacent styles: manhwa, anime, romance, action, sci-fi. Style is set once per generation for consistency. |
| Story-driven scene input | Describe a scene in plain English. The generator turns each beat into a panel with framing appropriate to the moment — close-up on reaction, wide shot on action. |
| Dialogue in speech bubbles | Include dialogue in quotes in your scene description and it gets placed into baked-in manga speech bubbles. Bubble style adapts to the moment (round for speech, spiky for shouting). |
| Multi-page export | Export a single page as PNG, or a full chapter as PDF or image sequence. Print-ready dimensions available if you plan to publish physically. |
Honest limits
These are real. Knowing them upfront saves you the frustration of expecting features that don't exist yet.
Speech bubble placement is baked in, not pixel-editable. You provide dialogue and the tool places it in bubbles at generation time. You can't drag bubbles around after the fact or re-shape them. If your project needs manual bubble control, use a dedicated comic authoring app.
Panel layout follows AI composition, not manual grid drag. You describe scene beats; the tool composes them into panels. You cannot set "3 panels in a T-shape with the top one twice as tall as the others." For custom-grid control, you'd need to compose the page manually.
Line-art export separated from tones is not available. Output is final-rendered. If you need clean linework as a base to hand-color yourself, this isn't the tool. Generation-only or full-render workflows fit.
B&W colorization of existing manga is not a feature. We generate manga from prompts. We don't take a scanned B&W page and add color. If that's what you need, look for dedicated manga colorizer tools — several exist, none are ours.
When another tool fits better
Honest routing. TaleAtelier is not the right tool for every workflow. Here's when to reach for something else.
You need editable bubbles and manual paneling. Clip Studio Paint and Medibang Paint are the industry-standard comic authoring apps. Steeper learning curve, full control over every pixel. If you already draw or want to learn, they're the serious tools.
You want vertical-scroll webtoon format instead of manga pages. See our AI webtoon maker for the dedicated tool, or the how to make a webtoon guide for the full drawing + AI-assisted workflow. Vertical scroll changes storytelling — a character turn can span multiple panels, gutters become scroll rhythm, mobile-first reading is assumed. Different format, different page.
You want to start from a real photo of a specific person. Use our photo-to-manga for manga-specific photo transformation, or photo-to-comic for any-style output. Upload a reference photo (yourself, a friend, a gift recipient with consent) and the character's identity locks from that face across every panel.
You want a general text-to-comic tool, not manga-specific. Our AI comic generator is the general workflow — Western comics, superhero, noir, children's book styles alongside manga. Same character-consistency engine, wider style range.
You need a starting plot or story structure. The AI anime plot & story writer generates Kishōtenketsu-structured beats + scripts + OC backstories, then feeds into the panel generator. Best for creators who want structural depth (4-part Japanese narrative) before drawing kicks off.
You want the traditional (non-AI) manga-making guide first. The how to make a manga guide covers every step from concept through published chapter — panel templates, page sizes, anatomy drawing, best apps, publishing paths. Free B5 panel template download included. Traditional, digital, or AI-assist — the workflow is the same.
You just want a short strip (3–9 panels), not a full manga chapter. The comic strip maker is the dedicated tool for short-form work — panel-count guidance, 15 story-starter ideas, faster generation.
What kind of manga you can make
Genre in manga is primarily an audience label, not a story requirement. You can generate isekai shonen or slice-of-life seinen — the tool handles any combination. Here's the reference table.
| Genre | Audience | Examples | Fits stories with |
|---|---|---|---|
| Shonen | Boys / teens; broad crossover | Naruto, One Piece, Demon Slayer | Action beats, tournament arcs, power-progression stories, big ensemble casts. |
| Shojo | Girls / teens; broad crossover | Fruits Basket, Ouran, Sailor Moon | Romance, emotional interiority, high school settings, soft palettes. |
| Seinen | Adult men; often crosses over | Berserk, Vagabond, 20th Century Boys | Mature themes, denser art, longer narrative arcs, morally complex characters. |
| Josei | Adult women | Nana, Chihayafuru, Princess Jellyfish | Realistic adult relationships, careers, more grounded settings. |
| Isekai | Genre-crossover, huge in 2020s | Re:Zero, Mushoku Tensei, Konosuba | Modern protagonist in fantasy world, RPG-inflected logic, worldbuilding heavy. |
| Chibi | Any age; gag / SD segments | Used in almost every manga for comic relief scenes | Super-deformed cute style, short gag strips, character mascots, holiday specials. |
For deeper style guidance on any of these, see the manga style guide or the full styles hub.
One scene, four traditions
The same page — same character, same gate, same afternoon — generated once in each of the four traditions the preview offers. Everything that changes between them is the style, which is also the point: the face holds across all four.
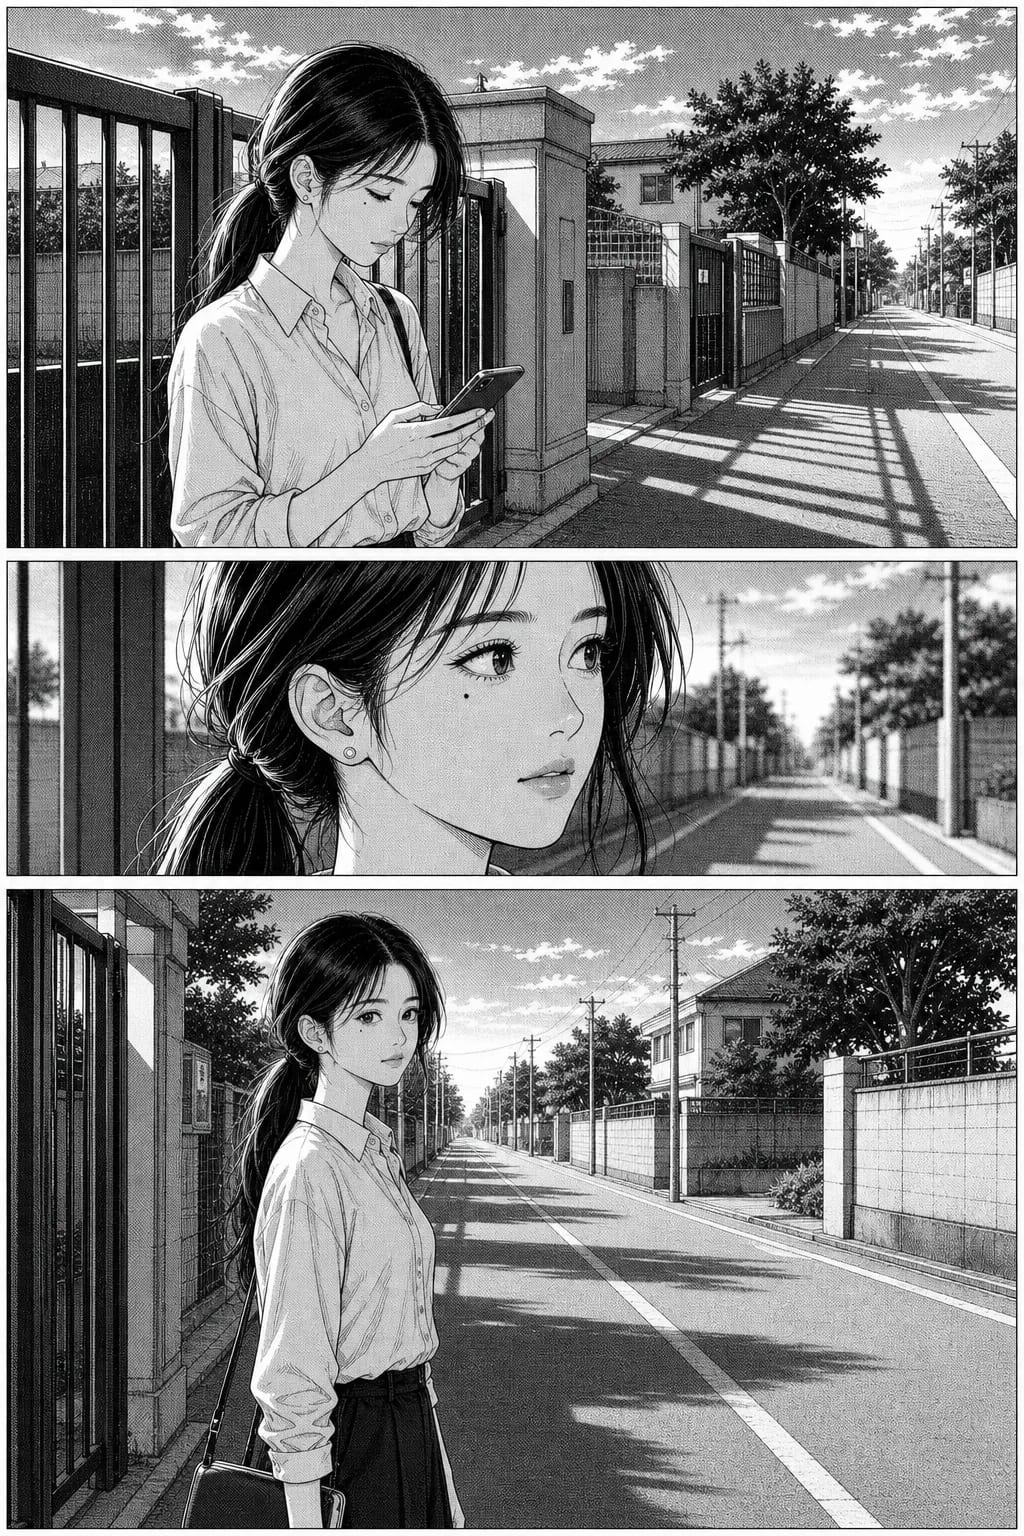
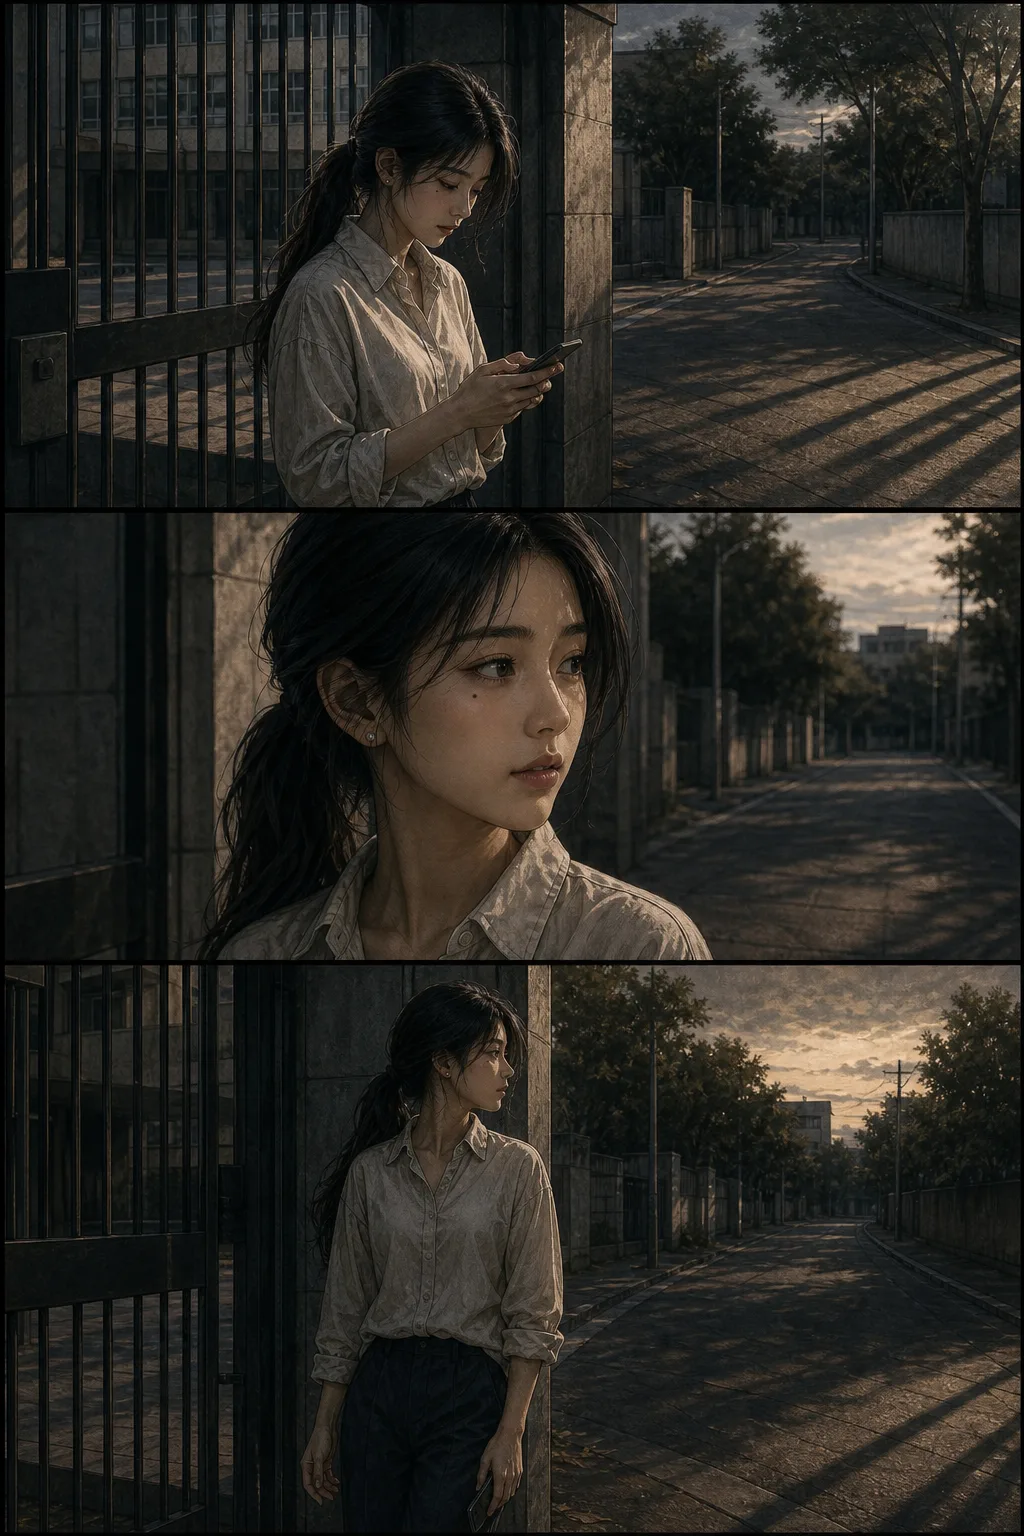
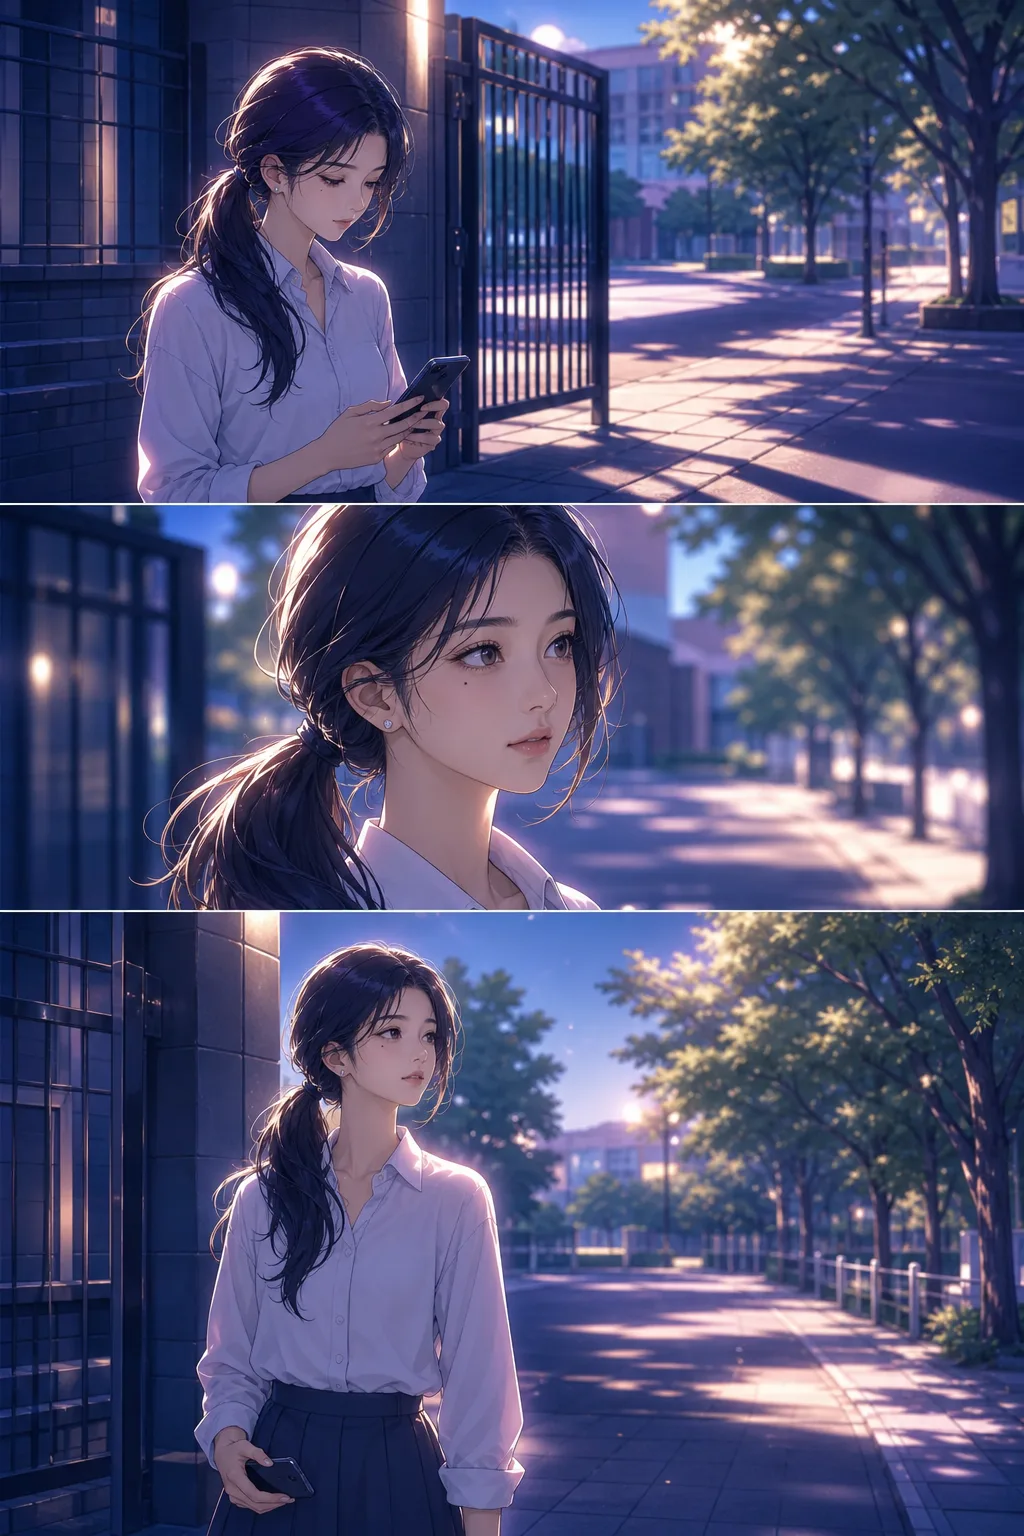
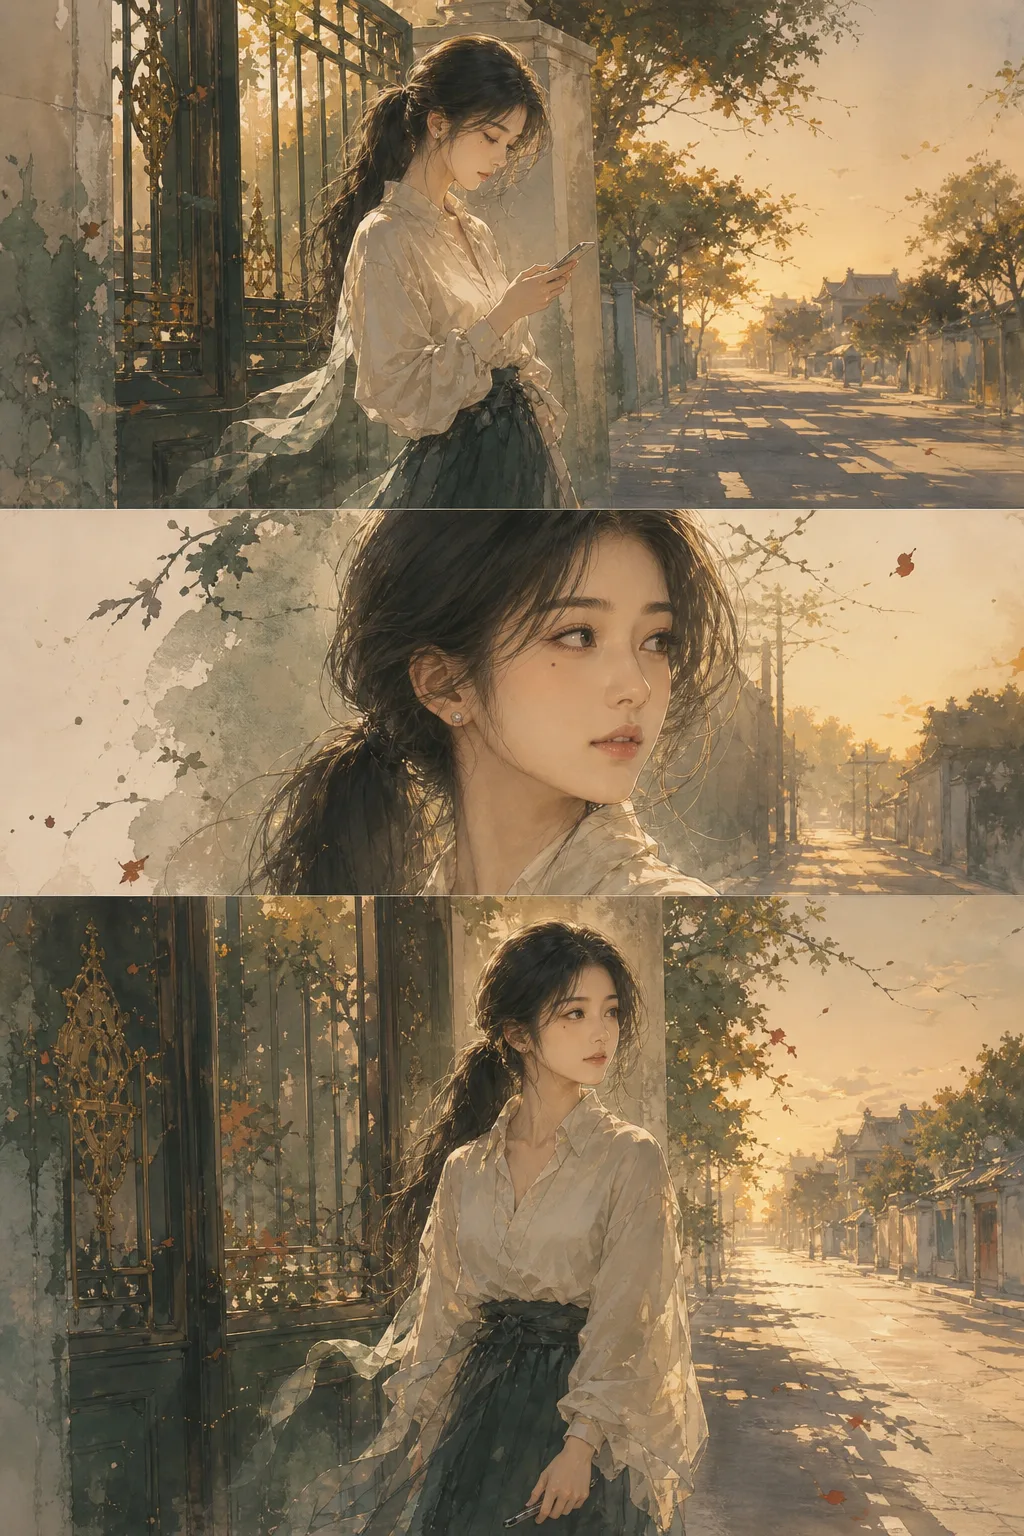
Only the first is black and white. That surprises people, and it is worth being clear about why: seinen is a readership — magazines for adult men — not an ink convention, and the style here is tuned for the grounded full-colour weight of Berserk or Monster. Manhwa and manhua are Korean and Chinese comics, born digital and in colour rather than in cheap weekly print.
Pick one and hold it for the whole chapter. Consistency across a run reads better than the “best” style, and switching midway is the fastest way to make a chapter look like it was assembled rather than drawn. Fifteen more styles — anime, chibi, noir, watercolour and the rest — are in the full editor.
Redo one page — and go back if you liked it better
Generated a twelve-page chapter and page seven is wrong? Redo that page on its own. It costs 100 credits, the same as generating it the first time — there is no separate edit fee and no discount, and we would rather say so than bury it.
What you get for it is that the redo makes minimal, targeted edits rather than re-rolling the page from scratch. The cast, the style, and the layout you already approved stay where they are; the thing you asked to change is the thing that moves.
And if the new version is worse, revert to the previous one. It is not gone. That is the part that makes iterating tolerable — you are not gambling a page you were happy with every time you try something.
Want a character built from a real photograph instead of a description? Photo to manga covers that path.
How to publish a manga you made with AI
You've generated a page or a chapter. Now what.
Export at the right size for your destination. Web platforms (WEBTOON Canvas, Tapas) want images sized for mobile reading — 800px wide is the standard. Print destinations want higher resolution — 300 DPI at final page size. TaleAtelier exports at web-optimized sizes by default; higher-resolution output for print is available on paid plans.
Understand what you own. Under the standard TaleAtelier license, you own the output you generate and can publish, sell, or monetize it. Details are on the terms page. Some publishing platforms have specific AI-content disclosure rules — check the platform's terms before you upload. Being upfront about AI use avoids problems later.
Pick a publishing destination based on your goal. For audience: WEBTOON Canvas (largest English readership) or Tapas (indie-friendly). For control: your own site or Patreon. For print: self-published paperback via KDP or Lulu. For a first project, Canvas or Tapas gets you readers fastest.
Publish consistently or don't publish. A manga chapter posted once and abandoned finds no audience. Weekly or bi-weekly cadence, held for at least six chapters, gives an honest signal of whether the story finds readers. Building an audience takes months.
Frequently asked questions
- Is the AI manga generator free?
- The preview is. Write a few beats into the box at the top of this page, pick one of the four manga traditions, and you get a cover and first page back from your own story — no account, no card. It is rate-limited per visitor because generation costs real compute. Carrying the chapter past page one runs on a plan: Starter $9.99, Plus $24.99, Pro $59.99 a month.
- Do characters actually stay the same across a chapter?
- Face, hair and the main outfit silhouette hold across a whole chapter, because the character reference is locked once before generation rather than re-prompted per panel. What still drifts: hands in complex poses, background characters, and fine costume detail at extreme angles — a limitation of current image models that every generator in this category shares. Giving each character one hard anchor detail, a scar or an eyepatch, and writing it into the script once measurably improves what survives.
- Does it place the speech bubbles for me?
- Yes, and that is the step most people are otherwise doing by hand in PowerPoint. Put dialogue in quotes in your script and it is typeset into the panel at generation, with the bubble shape following the beat — round for speech, spiky for a shout, cloud for thought. The bubbles are baked into the page rather than a text layer, so you cannot drag or reshape them afterwards; if you need that, a comic authoring app is the right tool.
- What does redoing a page cost?
- 100 credits — the same as generating that page the first time. There is no separate edit fee and no discount. The redo applies minimal, targeted edits instead of re-rolling the page, so the cast, style and layout you approved stay put, and if the new version is worse you can revert to the previous one.
- Are the pages actually black and white?
- One of them is. Classic manga generates genuinely monochrome pages — value built from screentone rather than desaturated colour, which is the print inheritance that gives manga its look. The other three are colour by design: seinen is tuned for the grounded full-colour realism of Berserk or Monster, manhwa for Korean webtoon bloom and magical auras, manhua for painterly wuxia. Pick classic manga if black-and-white is what you are after; the other three are manga-adjacent traditions that were never monochrome in the first place.
- What is the difference between an AI manga generator and a manga maker?
- A manga maker is a drag-and-drop editor — you place pre-drawn characters, backgrounds and bubbles onto a template yourself, the way desktop apps like ComiPo work. A generator draws original art from your script instead, which is what you want when the characters do not exist yet. If you are assembling something from a library of existing assets, a maker is the better tool and we would rather you used one.
- Can I publish or sell what I make?
- Yes — you own the output under the standard license. Common destinations are WEBTOON Canvas and Tapas for serialised reading, Amazon KDP for print and ebook, and GlobalComix or Gumroad for selling direct. Platform rules on AI-generated work differ and have been changing, so check the current policy of wherever you plan to publish before you build a series around it.
- How long does a chapter take?
- A single page generates in about two minutes. Most first-timers finish their first page in fifteen to thirty minutes including the writing, which is the part that actually takes the time — the generation is fast, deciding what happens on the page is not.
Read this guide in your language
日本語で読む: AI 漫画 生成 完全ガイド · AI 漫画 (AI manga) tool comparison, workflow, and prompting tips written for the Japanese market — different tool landscape (KO/JP-native players) than this English page.
한국어로 읽기: AI 만화 만들기 완전 가이드 · 무료 도구 10선 비교 · 젠툰·LlamaGen·Adobe Firefly 등 한국에서 쓸 수 있는 10개 도구를 정직하게 비교하고, 4컷 만화·캐릭터 일관성·AI 만화 vs AI 웹툰 차이까지 한국 시장 관점으로 다룬 버전입니다.
Make your first manga chapter
this week.
Create a free account, set up your cast, and pick a plan when you're ready to generate. Monthly plans from $9.99. Cancel anytime.
Start your first manga chapterLast reviewed